| Home | Previous Lesson: Composite Presentation Style Next Lesson: RichText Presentation Style |
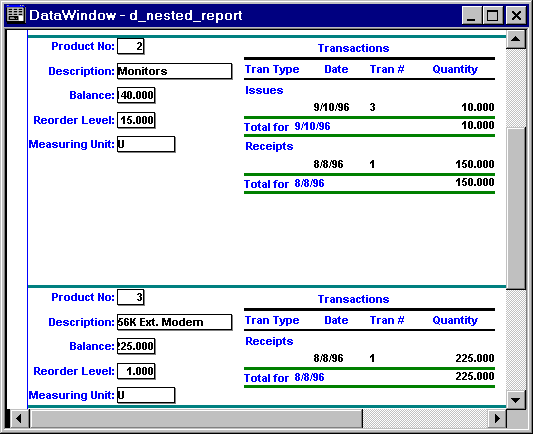
Let's consider a business requirement where a user wants to print all products from the product_master table and transactions for each of those items. His specification being that the product information (from product_master) be listed on the left side, one field per line like the free form presentation style and transactions (from trans table) be listed on the right side, one transaction per line like the tabular report, i.e. something similar to the picture show below.
To think about it, he is asking for a combination of a free form and tabular presentation styles, which is not possible, since you can specify only one presentation style per DataWindow. One solution is, choose tabular presentation style and arrange all fields from product_master one per line and place all fields from trans side by side, as shown in the following picture.
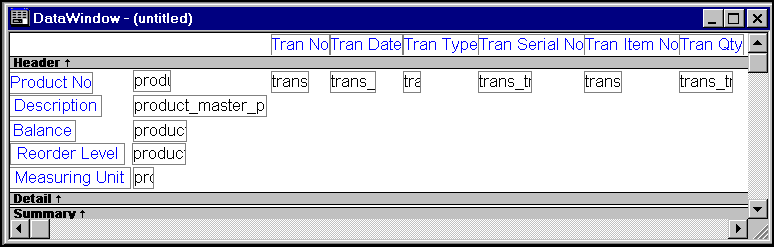
The idea is good. However, you find the problem only when you preview the DataWindow. You waste space, since each record takes the sum of the height of fields from product_master and the spaces between them.
Powersoft has a facility to insert a report (a DataWindow) into a DataWindow from version 4.0. onwards. Let's see if this facility provides any solution. Try this.
Paint a tabular DataWindow that retrieves all the transactions for a given product no from trans table sorted by tran_type, tran_date, tran_no and save the DataWindow, say as d_product_transactions. Notice from the following code, a retrieval argument aTranType is defined and it is used instead of hard-coding any product no.
SELECT "trans"."tran_no",
         "trans"."tran_date",
         "trans"."tran_type",
         "trans"."tran_serial_no",
         "trans"."tran_item_no",
         "trans"."tran_qty"
    FROM "trans"
   WHERE "trans"."tran_item_no" = :aTranType
Now, create a FreeForm DataWindow and select all the fields from product_master order by product_no. When you are in the design view, select Insert > Control > Report menu option, and click on right side of the detail band. You will be prompted for the report name, select d_product_transactions. You will be prompted for the aTranType as many times as the number of records in product_master table. Keep clicking Cancel button.
Once done, select d_product_transactions report that you just placed in the detail band and click on the triple dot button in the property sheet placed under Arguments group. Choose product_no for the expression dialog box. Add a thick line at the bottom of the detail band as shown in the picture and save the DataWindow as d_nested_dw_test and close it.
Open d_nested_dw_test again by selecting it from File > Recent Objects menu option. Bingo! The preview view will show you the same that is shown in the picture.
DataWindows of this type is called nested DataWindow. They are not updateable. This style is useful only when you have two or more related DataWindows and would like to generate a report using them.
When you preview the DataWindow, it might be different from the picture at the beginning of this page, i.e., you might find the horizontal line you placed at the bottom of the detail band appear at incorrect places, may be crossing the transactions. Don't worry about that for now, you find the solution later in this session.
| Home | Previous Lesson: Composite Presentation Style Next Lesson: RichText Presentation Style |