| Home | Previous Lesson: Edit Styles Next Lesson: Defining Primary Keys |
A validation rule defines what data is allowed in a column. Some of the RDBMSes such as Sybase support validation rules in the server.
When a validation rule is defined in the server, irrespective of the client that is trying to manipulate the data, server validates the data by applying the validation rules. For example, let table transactions have transaction_type column and you define a validation rule on the transaction_type saying that the valid values are 'receipt', 'issue' and 'return'. Now, you want to enter/change the data via Excel, Visual Basic, a C program, etc.. Unless you provide a valid data, server will not allow you to change/enter data in the table. This is called server side validation.
In PowerBuilder, you can define validation rules on the client side. It means that when you provide the data, the client (PowerBuilder) validates the data and sends the valid data to the database.
Difference between the client side and the server side validation is that only the client whichever defines it uses the validation rule. In the above example, say you define a validation rule in PowerBuilder and a Visual Basic client wants to change the data in the server. Sybase will not validate the data, since the validation rule is not defined in the server.
Then which is the right place to define the validation rules. It depends. In the client/server environment the best thing would be to define at both the places. Defining at the client will reduce a lot of network traffic. That is because the client sends valid data, instead of sending it every time and getting validation errors. Defining at the server would also be useful, because, if you want to add a new client type, say Java, you don't have to worry about wrong data.
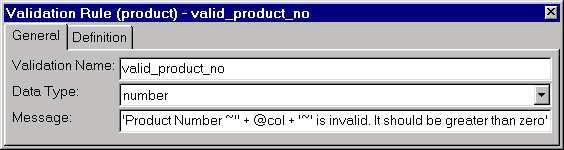
To define a rule select New from the Validation Rule folder's popup menu. Let's define a rule that the product number should be greater than zero. Provide the name as shown in the picture and select Number from Data Type DropDownListBox.
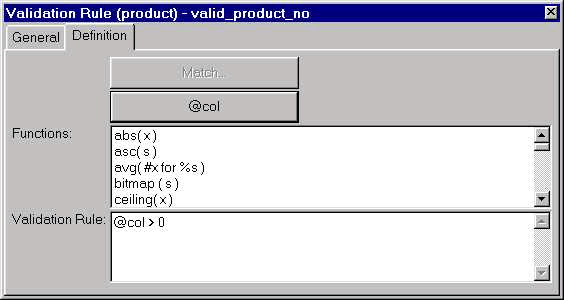
You need to provide definition for the Validation Rule prompt. The keyword @Col contains the value provided by the user. You can use functions available under the Functions ListBox.
The @col stands for the value the user types in, so the rule states that the length of the entry must be greater than 0. If the validation rule is broken, it is useful to display an error message to guide the user towards the type of input that is expected. This message is fully customizable, so try to make it as informative and useful as possible.
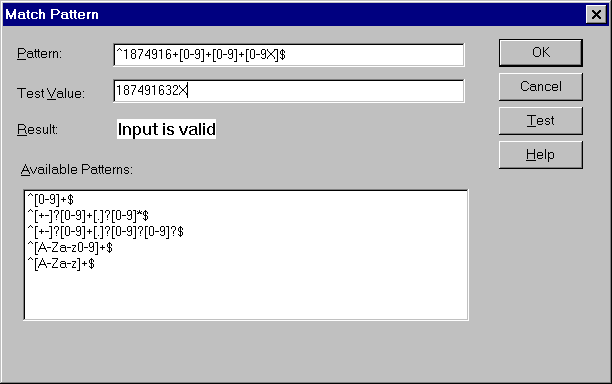
Another facility that PowerBuilder provides for string data types is Match. Using this option you can specify a range of specific values for a particular position in the string. To see how it works, click on the Match... button.
The ^ (hat) symbol represents the beginning of the pattern, the dollar sign ($) represents the end of the pattern and you can specify the exact values or range of values for any of the characters in between. We can use this feature to refine our previous validation rule.
For example, the ISBN 1874916 followed by three digits, even though in certain circumstances the last one could be an 'X'. The validation rule to test the ISBNs would be as follows:
^1874916+[0-9]+[0-9]+[0-9X]$
We can test the rule by typing a value into the 'Test Value' box and clicking on the Test button. You can see that the ISBN 187491632X is a valid input. If the input isn't valid, the test will detect it:
Click the OK button. Now the validation rule is defined. Once you define the validation rule, you need to assign the rule to the columns for which it applies. For example, you defined a rule v_valid_product that says 'value should be greater than zero'. Now, you want to assign that rule to product_no in product_master table, then you need either:
You can't do the same right away since you haven't defined the table yet. Do it after completing the exercises given at the end of the session.
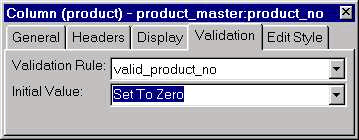
Similarly you can assign edit and display format styles also.
| Home | Previous Lesson: Edit Styles Next Lesson: Defining Primary Keys |