Introduction to PowerBuilder
Creating a Library
To create a library or to manage objects within the library, you need to invoke the library painter by clicking on  icon. By default, the library whichever has the Application object is displayed in the expanded mode, i.e., all the objects within the library are displayed. It is similar to the Explorer, where you see all directories to start with. Once you double click on the directory, it would expand and display all the files within the directory. All other directories are listed, but not expanded. Same is the case with PowerBuilder. Library in which the application object resides is expanded and other PowerBuilder libraries are just displayed.
Libraries that are not being displayed in the expanded mode have library icon. Libraries in the expanded mode have  library icon, similar to the OpenFolder icon in Explorer.
- To create a library, select Library > Create from the menu or click on
 icon.
icon.
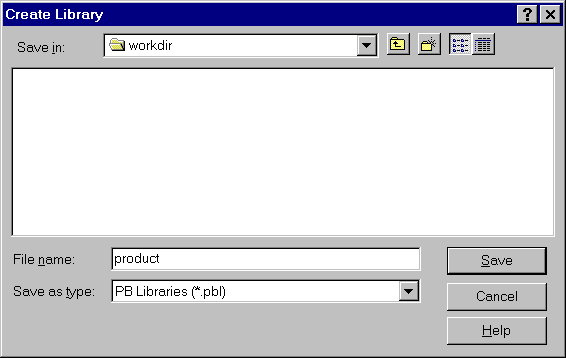
In the Create Library dialogbox, select the appropriate directory (we advise you to have a directory named workdir and use that directory throughout the course) and provide product (PowerBuilder automatically adds .pbl extension if you don't provide any) for the File name prompt and click on the Save button. PowerBuilder prompts you for the comments. Provide Library for 'Product Management System' application and click on the OK button. Now you can see the new library in the Library Painter.
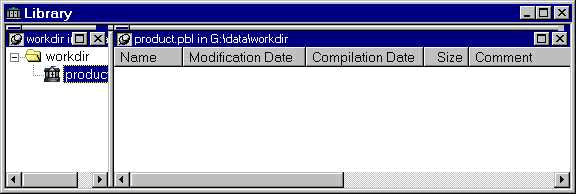
Close the Library Painter.