
| Home | Previous Lesson: Where I can use the Data Pipeline object and Pipeline User Object? Next Lesson: Defining Pipeline User Object |
Invoke the data
pipeline object painter by clicking on ![]() icon.
icon.
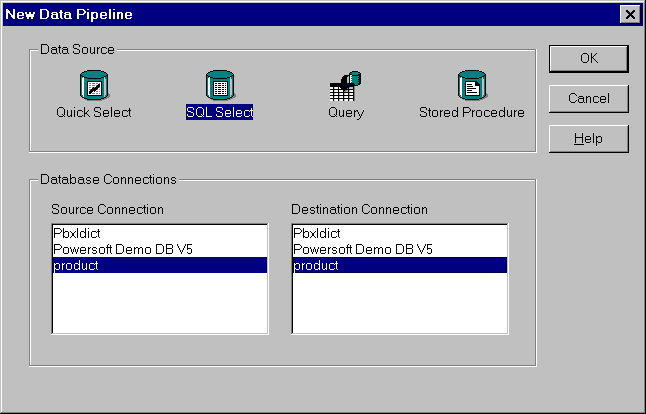
Dialogbox to create a new data pipleline object.
Here, you need to select two database profiles. One is the source and the other one is the destination. Our target of this example is to copy data from "product_master" to "product_master_history" table. We don't have the "product_master_history" table. Don't worry. Keep going. Select the "SQL Select" data source and click OK button. Select "product_master" from the Select Table dialog box and click on Open button. Select all the columns from the "product_master" table. Just for the sake of example, let's assume all obsolete products have "obsolete" word at the beginning of their description. Let's select only those items. Define the WHERE clause as follows:
lower("dba"."product_master"."product_description") like 'obsolete%'
Then
switch to the data pipeline definition mode by clicking on the ![]() icon.
icon.

Pipeline definition dialog box.
Here, you can specify the number of rows after which pipeline object has to COMMIT statement in the database. You can also specify the maximum number of errors after which pipeline has to stop pumping the data into the target table. Type-in the target table "t_product_master_history". If you want PowerBuilder to copy the extended attributes, check "Extended Attributes" option; you can do this only when you choose "Create" or "Replace" option for the Options prompt.
You have a lot of choices on how you want t copy the data. You can ask for:
| Create a new table specified in the "Table" prompt and insert rows in that table. | |
| Drop the existing target table and re-create the table and insert rows in the new table. | |
| Add rows to the specified table | |
| Update the rows in the specified table | |
| Delete the rows and insert rows |
We
need two of the above options. We need to create "t_product_master_history"
table since it's not existing. Later we need to refresh it. Just
select "Create
- Add Table" option. Turn on "Extended Attributes" option. Save the object
as "dp_copy_to_history". Don't exit from this painter.
Click on the execute ![]() icon. You will see the status
on the microhelp status bar. Now, the table is created and
eligible rows are copied.
icon. You will see the status
on the microhelp status bar. Now, the table is created and
eligible rows are copied.
From now onwards, we need to refresh the table. Basically, we add the rows. Now, select "Append - Insert Rows" option and save the object and exit the painter. Let's see how to use this in the script and move the rows to the history table.
| Home | Previous Lesson: Where I can use the Data Pipeline object and Pipeline User Object? Next Lesson: Defining Pipeline User Object |